
Laser Cutting Machine
激光切割机
Process Guide
操作指南
1. 基础介绍 Basic introduction Basic Introduction
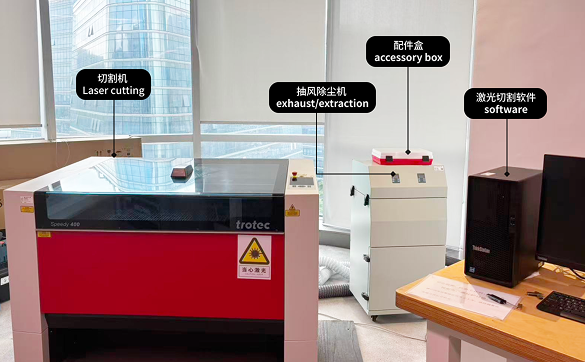
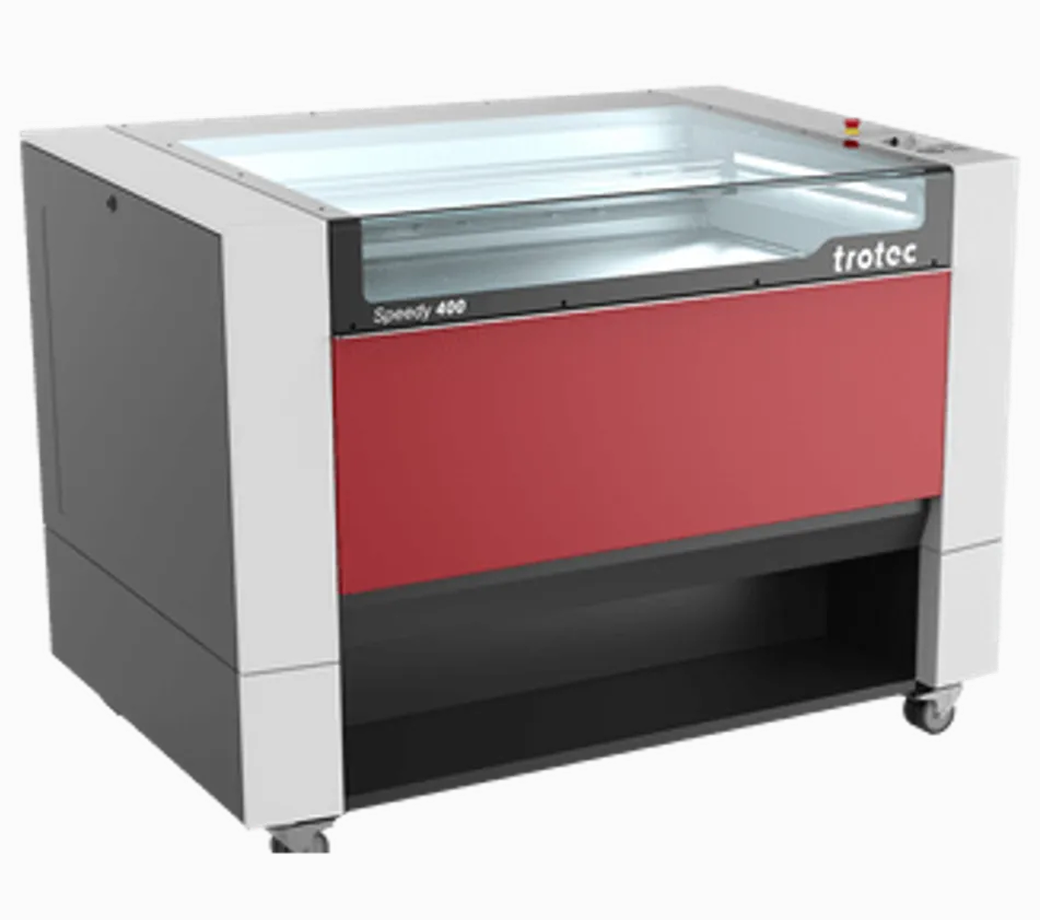
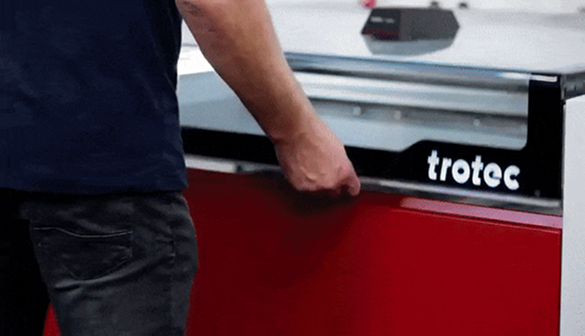
工坊激光切割区域主要包含激光切割机、抽风除尘机,还有配备专用软件的电脑。
The laser cutting area in the workshop mainly consists of a laser cutting machine, an exhaust and dust removal machine, and a computer equipped with special software.
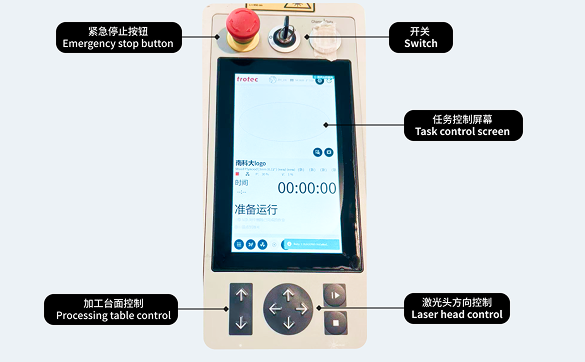
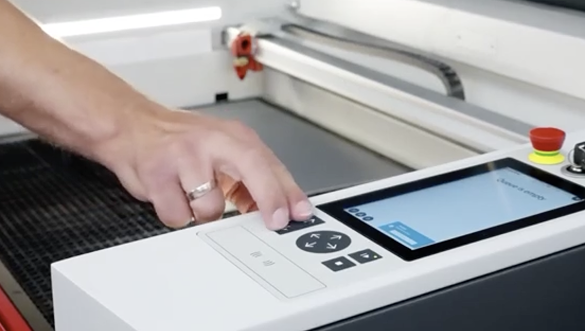
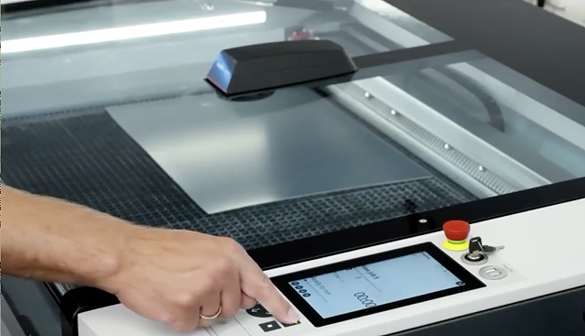
切割机操作面板集成了紧急停止按钮、开关、任务控制屏幕,以及用于控制加工台面和激光头方向的按键。
The operation panel of the cutting machine integrates an emergency stop button, a switch, a task control screen, as well as buttons for controlling the direction of the processing table and the laser head.
工坊激光切割区域主要包含激光切割机、抽风除尘机,还有配备专用软件的电脑。
The laser cutting area in the workshop mainly consists of a laser cutting machine, an exhaust and dust removal machine, and a computer equipped with special software.
切割机操作面板集成了紧急停止按钮、开关、任务控制屏幕,以及用于控制加工台面和激光头方向的按键。
The operation panel of the cutting machine integrates an emergency stop button, a switch, a task control screen, as well as buttons for controlling the direction of the processing table and the laser head.
2. 开机与系统初始化 Power On & System Initialization
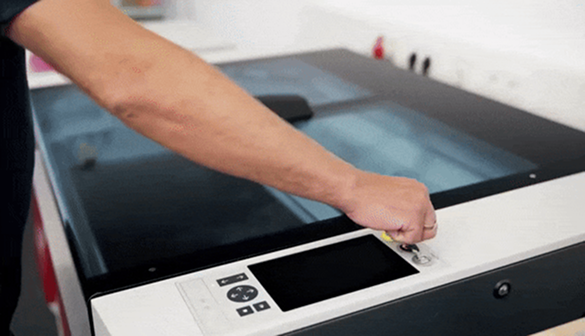
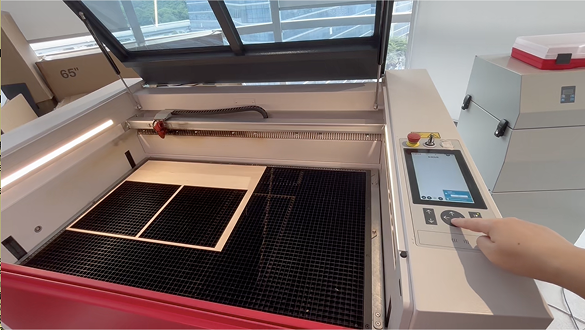
将钥匙插入开关,轻轻旋转至ON位置,然后松开。机器屏幕和指示灯应亮起,机器将自动进行初始化自检。您将看到X轴和Y轴移动回机械原点(通常位于左后方),Z轴可能会上下移动,整个过程大约需要1分钟。自检成功后通常会发出一声滴的提示音。如果自检失败,请首先检查设备舱门是否完全关闭且无遮挡,然后确认钥匙是否已正确旋转。如问题持续,请报告老师。
Insert the key into the switch, gently turn it to the ON position, then release. The machine screen and indicators should light up, and the machine will automatically perform an initialization self-test. You will see the X and Y axes move to the home position (usually the rear-left corner), and the Z axis may move up and down. The entire process takes approximately 1 minute. A successful self-test is usually indicated by a beep sound. If the self-test fails, first check that all equipment doors are fully closed and unobstructed, then confirm the key is properly turned. If the problem persists, report to the instructor.
3. 准备平台与材料 Prepare the Bed & Material
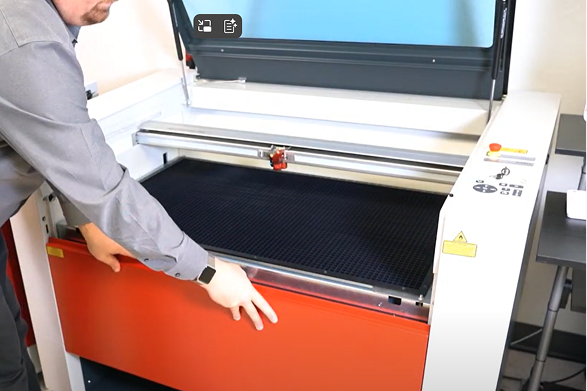
机器自检完成后,打开机器上盖。确定材料的面积和厚度,以便后续的排版和参数设置。最后,将材料平整地放入工作区域,确保材料不会移动。
After the machine's self-test is completed, open the upper cover of the machine. Then determine the area and thickness of the material for subsequent layout and parameter setting. Finally, place the material flat in the working area, ensuring it does not shift.
4. 定位与聚焦激光头 Position and Focus the Laser Head
定位:使用控制面板上的激光头方向控制键,将激光头移动到预期的雕刻/切割起始点(通常为材料左上角),确保激光头正对材料加工区域上方。
Position: Use the laser head control to move the laser head to the desired engraving/cutting start point (usually the top-left corner of the material). Ensure the laser head is directly above the material's processing area.
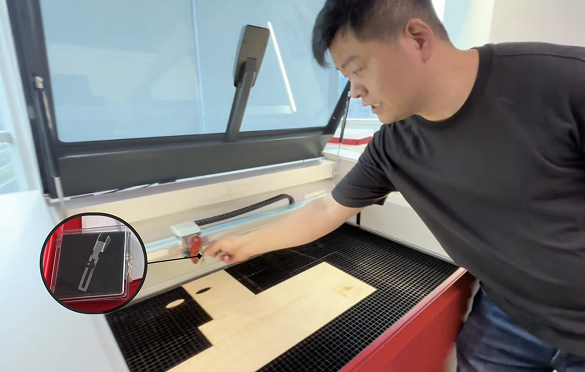
聚焦:确定激光头定位后,开始聚焦调整手动聚焦:将聚焦尺(配件盒内)挂在激光头侧面。缓慢升高加工台面(Z轴),直到聚焦尺刚好自由落下。此时焦距已调准。
Focus: After positioning the laser head, begin focus adjustment. Manual Focus: Hang the focus ruler (in the accessory box) on the laser head side. Slowly raise the worktable (Z-axis) until the focus ruler drops freely. The focus is now set.
自动聚焦:双手同时按下加工台面控制按钮,激光头会自动下降,用传感器探测材料表面并设置正确焦距。若按下按钮后无反应,请稍微移动激光头后再按下按钮。
至关重要:聚焦时一定确保聚焦点在材料上,否则激光头容易损坏
Auto Focus: Press the worktable control buttons with both hands simultaneously; the laser head will lower automatically, detect the material surface with sensors, and set the correct focus.
Critical: When focusing, ensure the focal point is on the material, otherwise the laser head can be easily damaged.
定位:使用控制面板上的激光头方向控制键,将激光头移动到预期的雕刻/切割起始点(通常为材料左上角),确保激光头正对材料加工区域上方。
Position: Use the laser head control to move the laser head to the desired engraving/cutting start point (usually the top-left corner of the material). Ensure the laser head is directly above the material's processing area.
聚焦:确定激光头定位后,开始聚焦调整手动聚焦:将聚焦尺(配件盒内)挂在激光头侧面。缓慢升高加工台面(Z轴),直到聚焦尺刚好自由落下。此时焦距已调准。
Focus: After positioning the laser head, begin focus adjustment. Manual Focus: Hang the focus ruler (in the accessory box) on the laser head side. Slowly raise the worktable (Z-axis) until the focus ruler drops freely. The focus is now set.
自动聚焦:双手同时按下加工台面控制按钮,激光头会自动下降,用传感器探测材料表面并设置正确焦距。若按下按钮后无反应,请稍微移动激光头后再按下按钮。
至关重要:聚焦时一定确保聚焦点在材料上,否则激光头容易损坏
Auto Focus: Press the worktable control buttons with both hands simultaneously; the laser head will lower automatically, detect the material surface with sensors, and set the correct focus.
Critical: When focusing, ensure the focal point is on the material, otherwise the laser head can be easily damaged.
5. 软件设置与文件传输 Software Setup & File Transfer
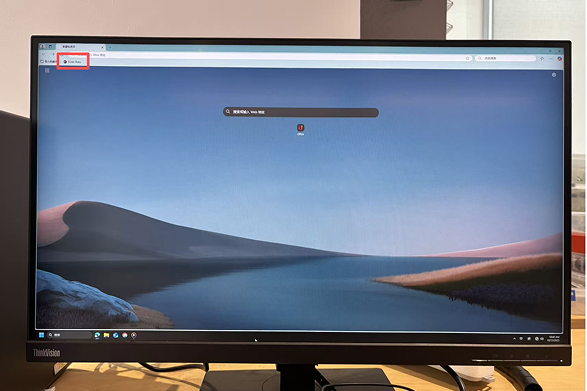
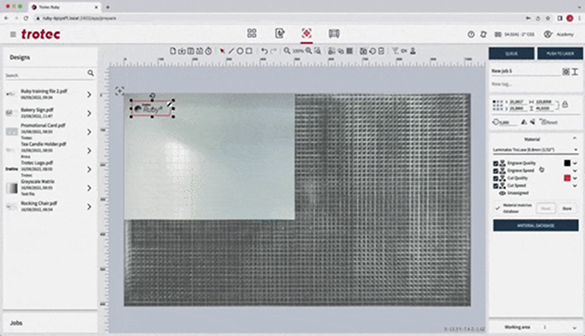
文件导入:打开浏览器收藏的激光切割软件网址,输入账号密码登录。在操作页面打开或导入你的设计文件(PDF、SVG、DXF等)。
File Import: Open the bookmarked laser cutting software website in your browser, enter your account credentials to log in. On the operation page, open or import your design file (PDF, SVG, DXF, etc.).
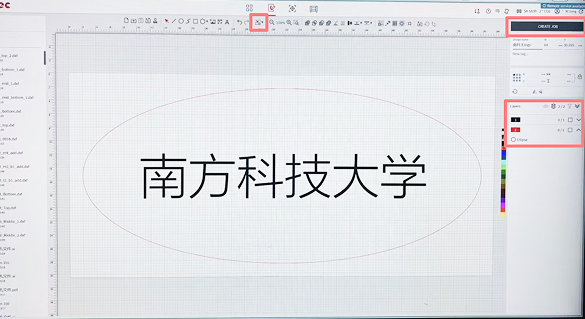
图形确认:确认图形颜色对应的加工方式,如红色线用于切割、黑色面型用于雕刻,避免切割线与雕刻线混淆。仔细检查设计稿,剔除重复线条,防止加工出错。点击适合设计按钮,并设置1-2mm边距,避免留白过大。
建立任务:点击Create job按钮。
Graphic Confirmation: Confirm graphic colors for processing (red=cutting, black=engraving) to avoid line confusion. Check the design draft, remove duplicate lines to prevent errors. Click Fit Design and set 1-2mm margin to avoid excess blank space.
Job Creation: Click the Create job button.
文件导入:打开浏览器收藏的激光切割软件网址,输入账号密码登录。在操作页面打开或导入你的设计文件(PDF、SVG、DXF等)。
File Import: Open the bookmarked laser cutting software website in your browser, enter your account credentials to log in. On the operation page, open or import your design file (PDF, SVG, DXF, etc.).
图形确认:确认图形颜色对应的加工方式,如红色线用于切割、黑色面型用于雕刻,避免切割线与雕刻线混淆。仔细检查设计稿,剔除重复线条,防止加工出错。点击适合设计按钮,并设置1-2mm边距,避免留白过大。
建立任务:点击Create job按钮。
Graphic Confirmation: Confirm graphic colors for processing (red=cutting, black=engraving) to avoid line confusion. Check the design draft, remove duplicate lines to prevent errors. Click Fit Design and set 1-2mm margin to avoid excess blank space.
Job Creation: Click the Create job button.
6. 设置切割细节 Set Cutting Details
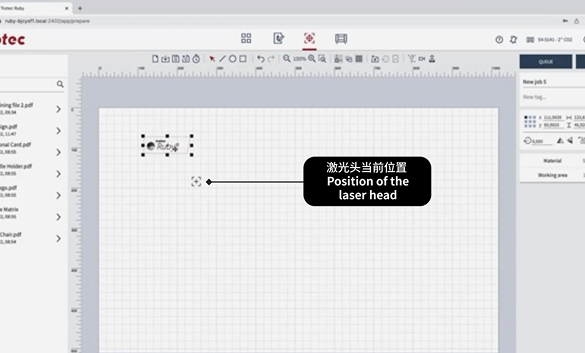
设置加工原点:将任务图形左上角对齐至激光头所在位置
Set Processing Origin: Align the top-left corner of the task graphic with the laser head's current position.
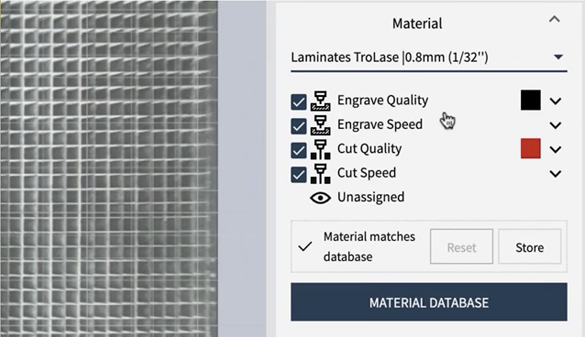
功率设置:结合实际材料厚度、特性和效果目标调整参数
工坊木板材料推荐参数
雕刻参数:功率50%-70%、速度50-100
切割参数:功率50%-70%、速度0.5-2(未切透可分2次切割)
Power Settings: Adjust parameters based on the actual material thickness, properties, and desired effect.
Recommended parameters for workshop wood materials:
Engraving: Power 50%-70%, Speed 50-100
Cutting: Power 50%-70%, Speed 0.5-2 (perform 2 passes if not fully cut through)
点击发送至切割机将任务发送到机器。
Finally, click Push to Laser to send the job to the machine.
设置加工原点:将任务图形左上角对齐至激光头所在位置
Set Processing Origin: Align the top-left corner of the task graphic with the laser head's current position.
功率设置:结合实际材料厚度、特性和效果目标调整参数
工坊木板材料推荐参数
雕刻参数:功率50%-70%、速度50-100
切割参数:功率50%-70%、速度0.5-2(未切透可分2次切割)
Power Settings: Adjust parameters based on the actual material thickness, properties, and desired effect.
Recommended parameters for workshop wood materials:
Engraving: Power 50%-70%, Speed 50-100
Cutting: Power 50%-70%, Speed 0.5-2 (perform 2 passes if not fully cut through)
点击发送至切割机将任务发送到机器。
Finally, click Push to Laser to send the job to the machine.
7. 开始切割 Start the Job
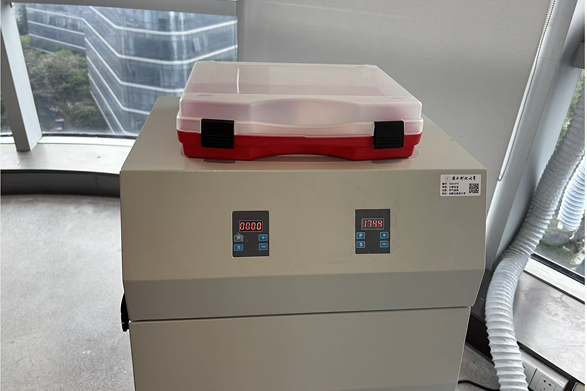
抽风:将风管伸出窗外,打开抽风机的电源,按下P键启动抽风功能。
Ventilation: Extend the air duct out of the window, turn on the power of exhaust machine, and press the P key to start the ventilation function.
开始切割:关闭机器上盖,按下机器控制面板上的开始按钮,设备将开始加工操作。
全程监控:操作员必须全程在场,定期检查加工状态,不得长时间直视激光,避免眼部损伤。
Start Cutting: Close the machine's top cover, press the Start button on the machine's control panel, and the equipment will begin the processing operation.
Full Monitoring: The operator must remain on-site throughout the process, check the processing status regularly, and must not stare at the laser for an extended period to avoid eye damage.
8. 完成工作与关机 Job Completion & Shutdown
切割完成后,让抽风机继续运行1-2分钟,以确保所有有害烟雾被彻底排出。关闭抽风机。打开机盖,小心地取走成品和废料,将可用的剩余材料妥善保存。用钥匙关闭机器,并将钥匙归还给工坊管理员。
After cutting is complete, let the exhaust system run for an additional 1-2 minutes to ensure all harmful fumes are completely extracted. Turn OFF the exhaust system. Open the lid and carefully remove the finished product and waste material, storing any usable leftover materials properly. Turn off the machine with the key and return it to the workshop administrator.
Safety Note
安全提示
-
严禁学生擅自关闭主电源。设备电源的开启与关闭必须由指导老师或在老师授权监督下进行。 Students are strictly prohibited from turning the main power on or off unattended. All power operations must be performed by the instructor or under their direct supervision.
-
切割完成后,切勿立即关闭抽风/除尘系统。必须持续运行,直至设备内部及工作区域的烟雾和尘埃完全排净后再关闭。 Do not turn off the exhaust/fume extraction system immediately after cutting is complete. It must continue running until all smoke and dust inside the machine and workspace have been completely evacuated.
-
激光切割机工作时,操作人员严禁离岗。必须全程密切监视激光头移动与切割过程,以防发生火灾或异常情况。 The operator must never leave the laser cutter unattended while it is operating. Continuous monitoring of the laser head movement and cutting process is mandatory to prevent fire or other emergencies.
-
如设备自检失败,首先检查设备所有舱门和保护盖是否已完全关闭并锁紧。若问题持续,请立即报告老师,切勿自行处理。 If the machine's self-test fails, first check that all doors and protective covers are fully closed and secured. If the problem persists, report it to the instructor immediately and do not attempt to fix it yourself.
-
在设计图纸时,请使用不同颜色(如:红色用于切割,蓝色用于雕刻)来清晰区分切割线和雕刻线,并在软件中正确设置对应参数。 When preparing your design files, use distinct colors (e.g., Red for cut, Blue for engrave) to differentiate between cutting and engraving paths, and ensure these are correctly assigned in the software driver.
-
切割前应优化图形排版,合理安排零件位置以最大化材料利用率,减少浪费。 Optimize the layout of your designs before cutting. Arrange parts efficiently to maximize material usage and minimize waste.
-
在放置材料后、开始切割前,必须重新测量材料的实际厚度,并在软件中校准焦距和功率设置。 Always re-measure the actual thickness of your material after placing it on the bed and before starting the job. Calibrate the focus and power settings accordingly in the software.
-
切割未知材料时,务必先在废料上进行测试。从较低功率和较高速度开始测试,并根据结果逐步调整参数,直至达到最佳效果。 Always test unknown materials on a scrap piece first. Begin with lower power and higher speed settings, then gradually adjust parameters based on the test results to achieve the optimal outcome.
-
切割易燃材料(如纸张、薄木板)时,建议采用多次通过的方式(较高速度、较低功率),以避免材料过度燃烧。同时必须格外留意观察,防止火灾。 For flammable materials (e.g., paper, thin wood), it is advisable to use multiple passes (higher speed, lower power) to prevent excessive burning or ignition. Extra vigilance is required to prevent fire.
-
如发生火灾、冒烟等紧急情况,立即按下紧急停止按钮,并迅速报告老师。熟知灭火器及消防设备的位置和使用方法。 In case of an emergency (fire, smoke), press the emergency stop button immediately and report to the instructor promptly. Be familiar with the location and operation of fire extinguishers and safety equipment.